- The Clean Car Cult
- Posts
- How I Apply A Ceramic Coating (Step-By-Step)
How I Apply A Ceramic Coating (Step-By-Step)
(Full pricing and Audio version included)
Daniel Baarns
January 19, 2026
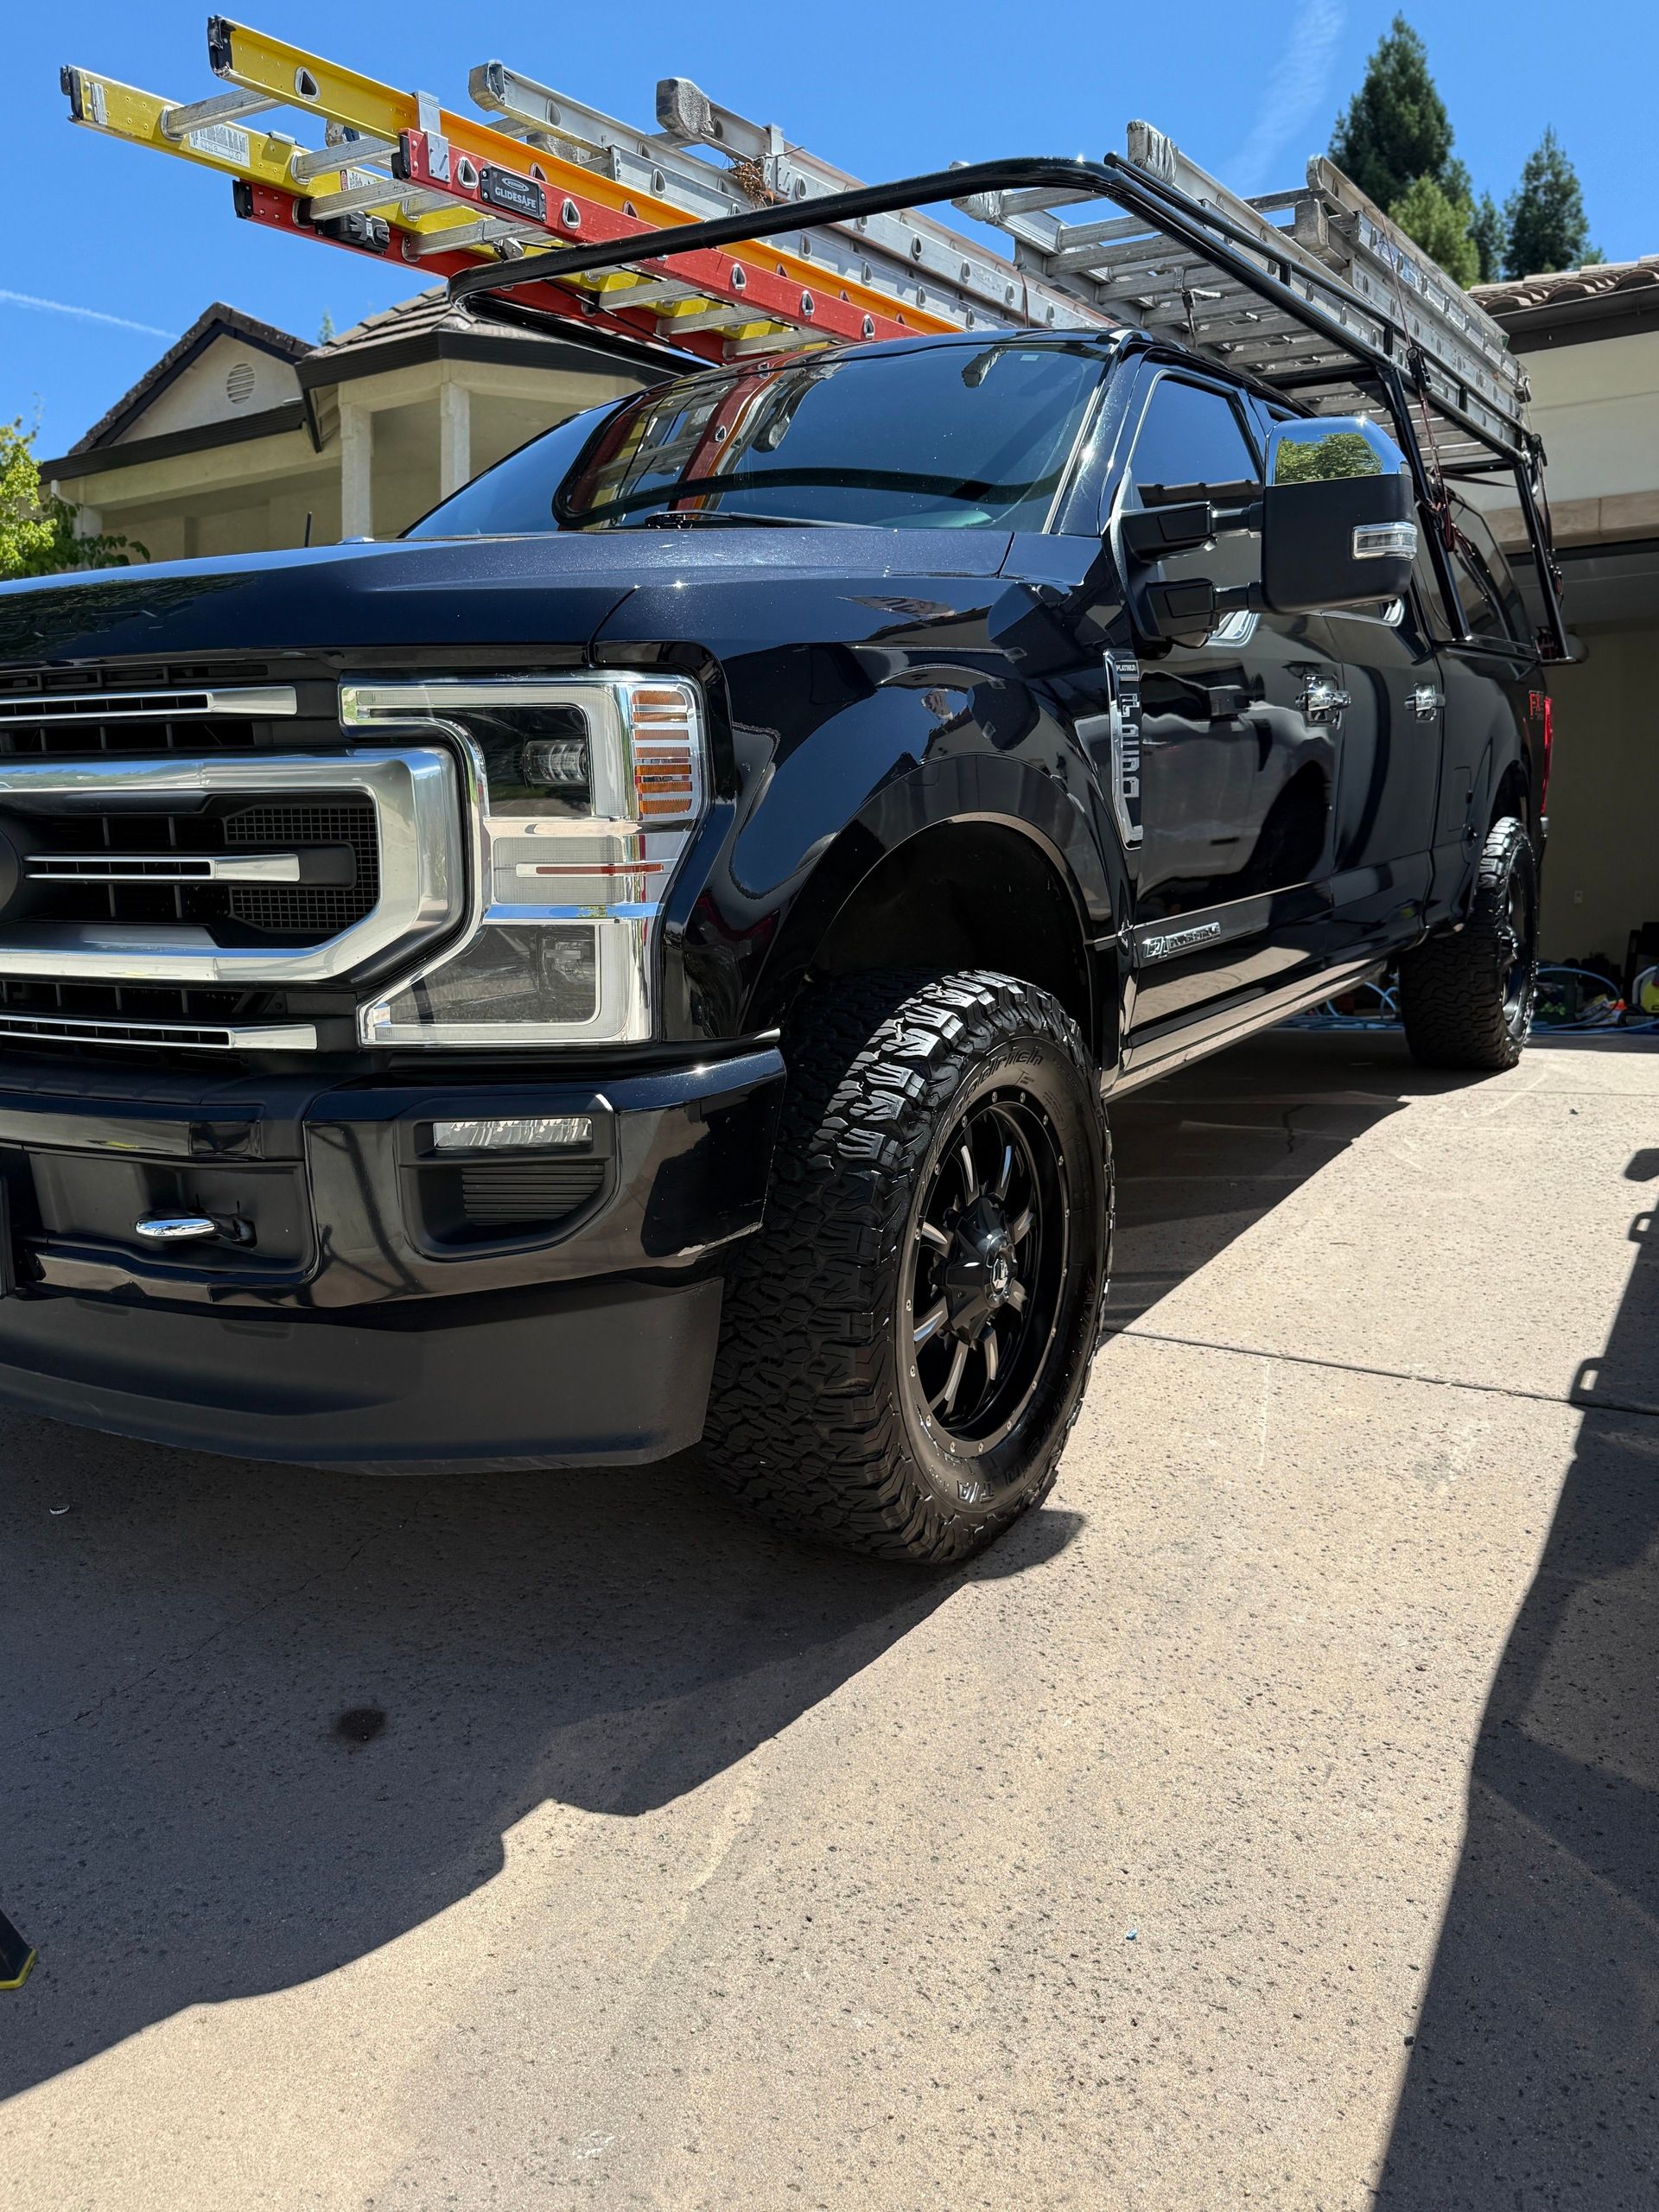
5 year Ceramic Coating and Premium Interior on a Work Truck.
I've spent three weeks explaining what ceramic coatings are and why you'd get one.
This week: how I actually apply them. (you can also listen to this newsletter by skipping to 19:24 of this youtube video. (it’s more of a podcast style that you can listen to while doing something else. Cardio, talking a walk, making dinner ect)
Because a coating is only as good as the prep work underneath it.
And most people have zero idea how much work goes into this.
Want the TL;DR version? Watch the entire process happen in 20 seconds on Instagram. Then come back here if you want to understand what the hacken you just watched.
Just 2 VIP 6-Month Clean Car Passes available. Six monthly visits + one full detail. $1643 value for $999. Text VIP to 916-273-3003 to claim one before they're gone.
The short version
A ceramic coating isn't something you spray on and walk away from.
It's a process.
If someone tells you they can do a "quick coating" in 2 hours, they're either lying or they're about to ruin your paint.
That's not a coating. That's a spray wax with a diploma from YouTube University.
Here's the actual process I use
Before I even think about applying coating, the paint has to be clean.
Not "looks clean."
Actually clean. At a microscopic level.
Here's what that means:
Wheels and tires cleaned – Remove all brake dust, road grime, and buildup. If the wheels aren't clean, the coating won't bond properly.
Pre-rinse – Blast off loose dirt and debris so I'm not grinding it into the paint during the wash. (Turns out rubbing sand into clear coat is bad. Who knew?)
Door jambs cleaned – Nobody sees this. I do it anyway. Because half-assing the prep means the coating fails early. Also because I can't sleep at night knowing I left dirt in the door jambs.
First foaming – Thick foam sits on the paint and breaks down contaminants. Gives the dirt time to loosen before I touch the car.
Contact wash – Two-bucket method. Wash mitt. Panel by panel. No shortcuts. No "just spray it with a hose and call it good."
Rinse – All soap off. Clean water only.
Second foaming – Yes, again. Because one pass doesn't get everything. I know it seems excessive. Your paint doesn't care about your feelings.
Clay bar – This is where I remove bonded contaminants. Rail dust. Tree sap. Industrial fallout. All the stuff embedded in your clear coat that washing doesn't touch.
(Fun fact: If you run your hand over your paint after washing and it feels rough, that's contamination. Your paint shouldn't feel like sandpaper. But here we are.)
If you skip this step, you're sealing contamination under the coating. That's not protection. That's preserving the problem.
Final rinse – Everything off. Paint is now completely clean.
Drying – Microfiber towels. No water spots. No streaks.
At this point, the paint is ready for the next step.
Most "quick detailers" stop here and call it a coating prep.
Cool story. I'm just getting started.
Step 2: Paint Correction (The Optional But Recommended Step)
This happens after the tires are dressed but before the paint prep.
Not every car needs this. But most do.
If your paint has swirl marks from bad washes, light scratches from automated car washes, or oxidation from years of sun exposure, this is where I fix it.
I use a dual-action polisher with cutting and finishing compounds. Work in 3x3 foot sections around the entire vehicle.
This takes 1-2 hours for a 1-step correction.
Why do this? Because the coating magnifies whatever's underneath it.
If your paint has swirls now, those swirls will still be there after coating. Just shinier.
The coating doesn't fix damage. It protects what's already there.
So if you want your car to look truly flawless, we correct the paint first. Then we protect that corrected finish.
Paint enhancement assessment requires extensive photos/videos but is best done in person. I'll look at your paint and tell you if you actually need it.
Step 3: Paint Prep (The Part That Matters Most)
Now the paint is clean. But it's not ready for coating yet.
There are polishing oils, wax residue, and microscopic contaminants still on the surface. Those have to come off or the coating won't bond.
Tires dressed – Get this out of the way now so I'm not accidentally getting tire shine on freshly prepped paint.
Paint prep solution applied – This is an alcohol-based cleaner that strips every trace of oil, wax, and residue from the paint.
I go panel by panel. Spray. Wipe. Check. Wipe again. Stare at it suspiciously. Wipe one more time just to be sure.
If there's any contamination left, the coating won't bond properly. It'll streak. It won't last.
This step is tedious. Not exciting. Not Instagram-worthy. But it's the difference between a coating that lasts 5 years and one that starts failing in 6 months.
I've seen DIY coatings fail because people skipped this step. Thought they could just "wipe it down real quick."
Yeah, no.
Step 4: Coating Application (The Nerve-Wracking Part)
Now we're ready.
Paint is clean. Prepped. Ready to bond.
Coating application – I go car by car. I mentally cut up the whole vehicle into 2-3 foot boxes and work systematically.
Hood. Front fenders. A-pillar and front of roof. Front door. Back door. Rear fender. Trunk. Rear of roof.
Then I come back: front bumper, side skirts, rear bumper.
Back to front. High to low. It's a whole system.
(If you're wondering why this order matters: gravity exists. Drips are annoying. Physics wins every time.)
But here's what most people don't realize: it's not just "wipe it on and you're done."
Every single section is a 4-step process:
Step 1: Apply the coating with the applicator pad. Thin, even layer.
Step 2: Use a dry microfiber towel to level the coating.
Step 3: Use a damp towel to go over everything again and check for any remaining product. (High spots love to hide. This step finds them.)
Step 4: Use a final plush towel for the final buffing. This is what gives it that glass-like finish.
And that's just ONE section.
Then you repeat that entire 4-step process over the entire car.
This is why coating application takes 1.5-3 hours. It's not one step per panel. It's four steps per section, multiplied by 15-20 sections.
Now here's where the 3-year and 5-year coatings differ:
3-Year Coating (P&S Inspiration): You have to move quickly because it flashes fast, but you can work in bigger sections—3x3 feet. More forgiving. Beginner-friendly if you're thinking about DIY. (if you really want to DIY use the 1 year coating)
5-Year Coating (P&S Stout): You have to work in very small sections—2x2 feet max. Sometimes smaller if it's hot out. This stuff is NOT beginner-friendly. The capacity for high spots is way higher. If you're thinking about doing this yourself, do NOT start with the 5-year coating. You will hate your life.
Depending on the vehicle size, this takes 2-4 applicators. The 5-year coating needs more applicators than the 3-year because it's thicker and you're working in smaller sections.
Timing matters here.
Wait too long and the coating hardens before you can buff it. You'll have high spots. Streaks. A finish that looks like you hired your cousin to do it.
Not long enough and it won't bond properly. You'll have weak protection that fails early.
This step takes 1.5-3 hours depending on the vehicle size.
I work in your garage or driveway, but I check temperature and humidity first. Too hot, too cold, or too humid and the coating won't cure right.
Wheel coating application – Same process. But harder. Because wheels were apparently designed by someone who hates detailers.
Wheels have curves. Spokes. Tight spaces. Calipers that are just close enough to be annoying.
Takes longer. But coated wheels are a game-changer.
Brake dust wipes off instead of baking on. Your wheels stay cleaner for weeks. Worth every extra minute.
Final quality control – I inspect every panel. Check for high spots. Make sure the finish is even. Fix anything that's not perfect.
This is where experience matters. I've done dozens of coatings. I know what to look for. I know what "good enough" looks like.
Spoiler: it's never actually "good enough" until it's perfect.
Step 5: Curing Time (The Part You Can't Rush)
Once the coating is applied, it needs time to cure.
Here's where the 3-year and 5-year coatings differ:
5-Year Coating: This stuff bonds almost instantly. You'll see a huge pop to the paint right after application. It's dramatic. Clients usually say something like "oh man" when they see it.
You still shouldn't get it wet for 24 hours. But if you absolutely need to drive it, you're not going to destroy the coating.
3-Year Coating: This one needs a full 24 hours to cure properly. It'll look good right after, but it'll look way better in 24 hours once it's fully cured.
Ideally you keep it inside during that time. Garage. Carport. Covered parking. Anywhere that's not actively raining on it.
If you need to use it, fine. Just don't wash it or let it get soaked if you can avoid it.
Both coatings: Don't wash the car for 2 days after application. Minimum.
During that time, the coating is bonding to your paint at a molecular level. Chemistry is happening. Don't interrupt the chemistry.
If you wash it too soon, you'll damage the finish before it's even had a chance to do its job.
This is why I give every client detailed instructions on what to do (and what not to do) after a coating.
Most people don't realize this part exists. Then they wonder why their DIY coating didn't last.
Turns out following instructions matters. Wild concept.
Pricing (Because You're Probably Wondering)
Here's one option at each level to give you an idea. Full pricing list at the bottom.
5-Year Coating + Wheels + 2-Step Paint Enhancement: $1,799
The full package. Maximum protection. Paint corrected to remove 70-80% of swirls and scratches. Wheels coated. This is what people do when they just bought their dream car or plan to keep it 10+ years.
3-Year Coating + Wheels: $949 or $383 a month for 3 months (Most Popular)
This is the sweet spot. Strong protection. Coated wheels. No paint correction (unless you add it). Most people choose this because it's the best value for 3-5 year ownership.
1-Year Coating + Wheels: $599
Short-term protection. Good if you're not sure about long-term ownership or want to test out a coating before committing.
All coating packages include a free Premium Exterior Detail ($200 value). You're not paying extra for the prep work. It's part of the package.
3-Month Financing Available: Protect now, pay later. Add $200 to any coating and spread it over 3 months. Makes the investment easier to manage.
Complete Pricing List
5-Year Coating Options:
5-Year + Wheels + 2-Step Paint Enhancement: $1,799
5-Year + Wheels + 1-Step Paint Enhancement: $1,499
5-Year + Wheels: $1,199 or $466 for 3 months (Most Popular 5 year)
5-Year (Paint Only): $999
3-Year Coating Options:
3-Year + Wheels + 2-Step Paint Enhancement: $1,499
3-Year + Wheels + 1-Step Paint Enhancement: $1,199
3-Year + Wheels: $949 or $383 for 3 months (Most Popular 3 year)
3-Year (Paint Only): $799
1-Year Coating Options:
1-Year + Wheels: $599 or $266 for 3 months (Most Popular 1 year)
1-Year (Paint Only): $499
Add-On:
1-Step Paint Enhancement (can be added to any coating): $299
All packages include a free Premium Exterior Detail ($200 value). Paint enhancement assessment requires extensive photos/videos but is best done in person.
What you're actually paying for
When you pay $949 for a 3-year coating or $1,199 for a 5-year, here's what you're getting:
6-8 hours of labor (sometimes more for larger vehicles or paint correction)
Professional-grade materials (not the $40 Amazon kit)
Years of experience knowing how to prep, apply, and troubleshoot
A process that actually works instead of a weekend experiment that peels in 6 months
A warranty that the coating will perform as promised
Could you do this yourself?
Technically, yes.
You'd need:
Go through an in-person training $1500-$3000+
Dual-action polisher ($150-$300)
Pads and backing plates ($50)
Compounds and polishes ($100)
Clay bar kit ($30)
Panel prep solution ($20)
The coating itself ($80-$150 depending on quality)
Applicators, microfiber towels, and supplies ($40)
Total: $470-$690 in materials.
Plus 10-12 hours of your time.
Plus the knowledge to not screw it up.
Most people try it once. Realize how much work it is. Realize they missed a step or applied it wrong. Then call me to fix it.
At which point they've spent the money and wasted a weekend and still need to pay me.
Just book it right the first time.
Why January is the move
January is slow for most people. Recovering from the holidays. Not thinking about their cars yet. Still trying to remember their New Year's resolutions.
But if you wait until March or April, I'm booked.
Everyone suddenly remembers their car exists when spring hits. Coatings take 6-8 hours. Details take 3-4 hours. There's only so much time in a day, and my calendar fills up fast.
January? I've got space. (only 2 for coatings, january 27th and 28th) and only 5 for the beginning of February.
You book now, I get you in before the spring rush. Your car is protected before pollen season turns it yellow. You start the year with a vehicle that looks brand-new.
Plus, a lot of people use tax refunds for coatings. January is when they're planning that spend anyway. Might as well get ahead of it.
Here's what happens next
If you've been reading these emails and thinking "yeah, I should do this," stop thinking and book it.
I've got 2 coating slots left in January.
After that, we're into February and March and I'm fighting spring detail season.
Text me at 916-273-3003. Tell me what you're driving and when you want it done.
I'll give you an exact quote, walk you through the process, and lock in your date.
Or if you're still not sure, just reply to this email. Ask me whatever you want. I'll answer honestly.
But if you're ready, don't wait.
January slots are almost gone.
— Daniel
P.S. I send photos and video updates throughout the entire process when I coat your car. You'll see every step. Before, during, after. No mystery. No surprises. Just transparency and work that actually lasts.
P.P.S. Still 3 VIP 6-Month Clean Car Passes available. Six monthly visits + one full detail. $999. Text VIP to 916-273-3003 to claim one before they're gone.

5 Year Coating and Premium Interior on a 2024 Lexus. (flown to florida for this one)